Monday, June 27, 2011

Scrap Box Sunday: Super Features and Link Party #13!

*cough* OK, OK, I know I'm failing at my blogging schedule again and that this is in fact Scrap Box MONDAY, but you'll just have to forgive me again XD

Let me start by saying - you guys are EPIC! That was such a great link party full of fabulous projects!! As promised, here are the top clicked links from the last couple of weeks:

The Hadeda Bracelet by The Littlest Crafter


Just gorgeous! There were definitely some fabulous ideas in the last party that I will have to try out myself very very soon!! If you were featured, please feel free to grab a Featured Button from here!


Lucky 13th Linky Party Time!

Link up anything that you've made with scraps lying around your craft room! It doesn't have to be fabric scraps, it could be paper, ribbon, food, beads anything! Today's link party will close on Friday the 1st of July, so you've got an extra day to enter to make up for it being a day late starting ;)

Just display H&H's button somewhere on the post or in your sidebar, and link up! Link as many projects as you want, as long as you haven't linked them up here before.


It's Monday! A Slippery Visitor

For my Monday sharing this week I'm being completely random - be warned that this post has absolutely nothing to do with crafts, cooking, art or ANYTHING like that!


And more importantly, if lizards give you the creeps, look away now...!


We have an adult lizard who hangs out in our driveway sunning himself on warm days, but I've never managed to get a photo. The other day we had a smaller dude hanging out in his place, and I actually managed to get really quite close to it and take some cool pictures, so I decided that I'd share and hopefully at least some of you will enjoy them ;)


... are you ready to see the photos of my awesome visitor?


Why, hello Mr Lizard! 


How awesome is this guy?


It's definitely a Blue Tongue!


Actually, this little dude got pretty cranky with how close I was and even hissed at me, so I left him alone to get back to sun-bathing after I snapped this picture ;)

Disclaimer: I actually have no idea of the gender of the lizards XD


I hope you enjoyed my little sample of Aussie wildlife!
Have a wonderful week beautiful people! <3


Friday, June 24, 2011

200 Followers Giveaway

While I was away, we hit a milestone! 200 followers, WOW!! Thank you everyone for your support! It absolutely makes my day when I see the blog and Facebook page growing and get your kind comments and messages, and I love being able to share my enjoyment of creating with you all! <3

In celebration of 200 followers, and in keeping with blogging tradition, I'm of course having a giveaway!!

The lucky winner will receive...

This lovely one of a kind, sunshine yellow button necklace hand created by me:

(Click the images for a bigger picture)

PLUS their choice of one pair of clay stud earrings from the selection
on the Hazel and Honeysuckle Facebook page!


How does that sound??

OK, here's how to enter...!

Leave a comment on this post for each entry!

* Be a follower of the H&H blog (** compulsory ** 1 entry)
* "Like" the H&H Facebook page (1 entry)
* Share about this Giveaway on your blog or Facebook page (2 entries, 1 entry each)
* Order something from the H&H MadeIt store (5 entries per order)

This giveaway will close on Friday July 9th!
Good luck! <3


Thursday, June 23, 2011

Whip It Up Wednesday: Trinket Box

OK, so it's Whip It Up Thursday - sorry! I thought I'd well and truly be back in action by now but it seems not! I have a stack of half finished projects that I'll share with you as I wrap them up :)

Today's project is my Fabric Decoupaged Trinket Box

What You Need:

* A trinket box to decoupage ;) 
I bought a glass topped jewellery box from the craft store, but you could find something
at a thrift store to give new life to if you wanted!

* An assortment of fabric scraps

* Mod Podge
I think matt finish works best with fabric

* Coordinating ribbon
The width of the ribbon should be the same as the edges of the box - the pictures
later in this tutorial will help explain what I mean by this!


What To Do:

Before you cut any strips of fabric, plan out which fabric you're using for each compartment in your trinket box - you can see most of my "plan" in the What You Need image above.

For each compartment, cut one strip of fabric that will cover the two side edges and the back of the compartment, then cut two smaller rectangles for the top and bottom edges.


Using matt finish Mod Podge, glue all of your fabric strips into place. I found it easier to stick down the back first, then smooth from the middle out to the edges. Try to push the fabric into the back corners for a neat finish. Once stuck in place, brush on a top coat of Mod Podge, and clean up any excess Mod Podge as you go.


Now we get onto our ribbon. I cut strips of ribbon for all of my inside edges, so 5 short and 2 long strips. Mod Podge these into place, and give them a top coat as well.


I was happy with my trinket box at this stage, so I stopped decorating here. You could also run ribbon around the outside edge, and could paint or otherwise decorate the outside of the trinket box - I'm hoping to get a Silhouette for my birthday in July, so if I do I plan to make a vinyl stencil for the glass on the lid. For now I like the raw look, it matches with the other bits and pieces in my messy, student house.


Now you just need to fill it with things that you like! I like tea :)


Have a wonderful week beautiful people!


Sunday, June 19, 2011

Guest Post! Chocolate Chip Half & Half Cookies by Brycie from Reenie Jae Creations

Today the gorgeous Bry from Reenie Jae Creations is guest posting for us! 
Thank you so much! <3

I'm in the mood for COOKIES! So here is one of my new favorite recipes!

Chocolate Chip Half & Halfs

Half regular chocolate chip, half chocolate chocolate chip!
YUMMY!


So let's get baking shall we.....

let's do this in SECTIONS...

Pre-heat oven to 350 degrees

Ingredients:
1 cup unsalted butter
3/4 cup sugar
1/2 cup brown sugar
1 to 2 tsp vanilla
2 eggs

Step 1: Cream all these together in mixer..... 
2 1/4 cups flour
1 tsp baking SODA
1/2 tsp salt

Step 2: Sift together & add to the creamed mixture.....
MIX WELL
1 1/2 to 2 cup chocolate chips
Mix into dough

Now comes the HALF & HALF part.....
From your mixing bowl REMOVE HALF of the dough.

Now to the dough IN the BOWL add 1 to 2 tablespoons COCOA powder
(I like to use GHIRARDELLI Cocoa powder)

Mix!

Now take a little of  both doughs and roll them together into a BALL.
Place each ball onto an UNgreased cookie sheet.


Bake at 350 for 9 minutes and still soft in the center.
And there you GO! A nice little cookie that's a good mix!


Enjoy!


Oh wow, these look delicious! Thank you for sharing this yummy recipe today!
Bry's blog Reenie Jae Creations is another of my favourites, Bry is just too fun! I adore her style, and she even has an Etsy shop full of gorgeous goodies! Head over and say hi from me!


Wednesday, June 15, 2011

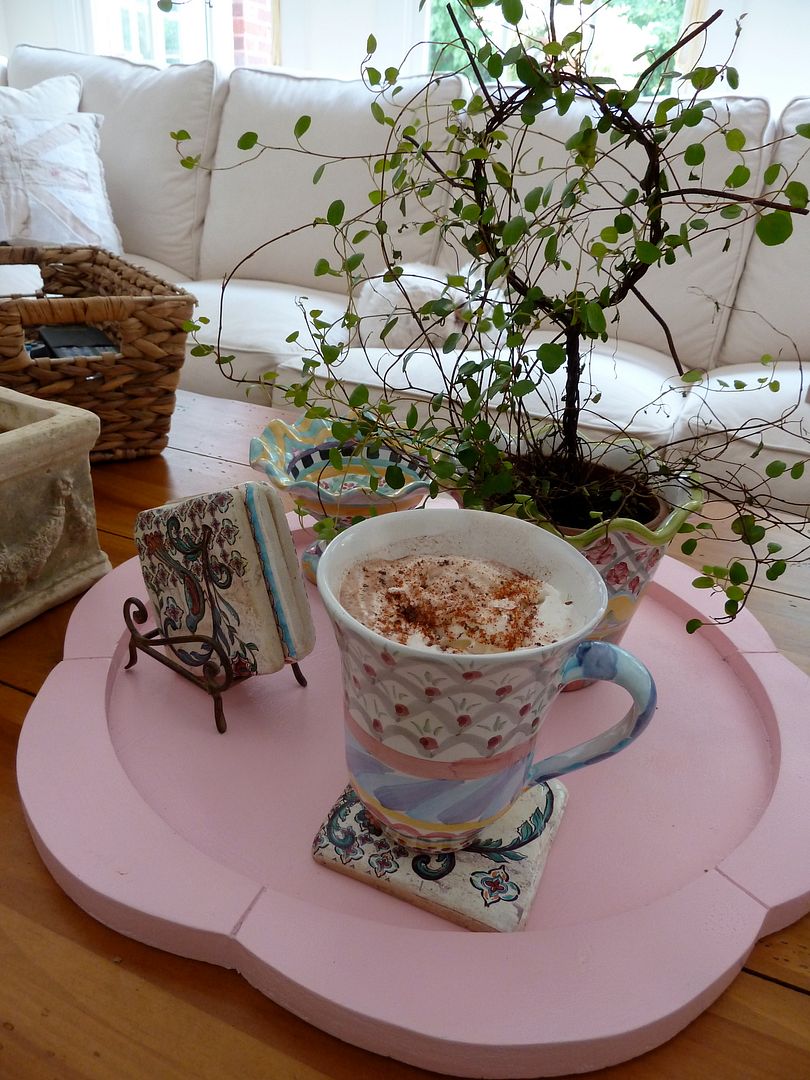
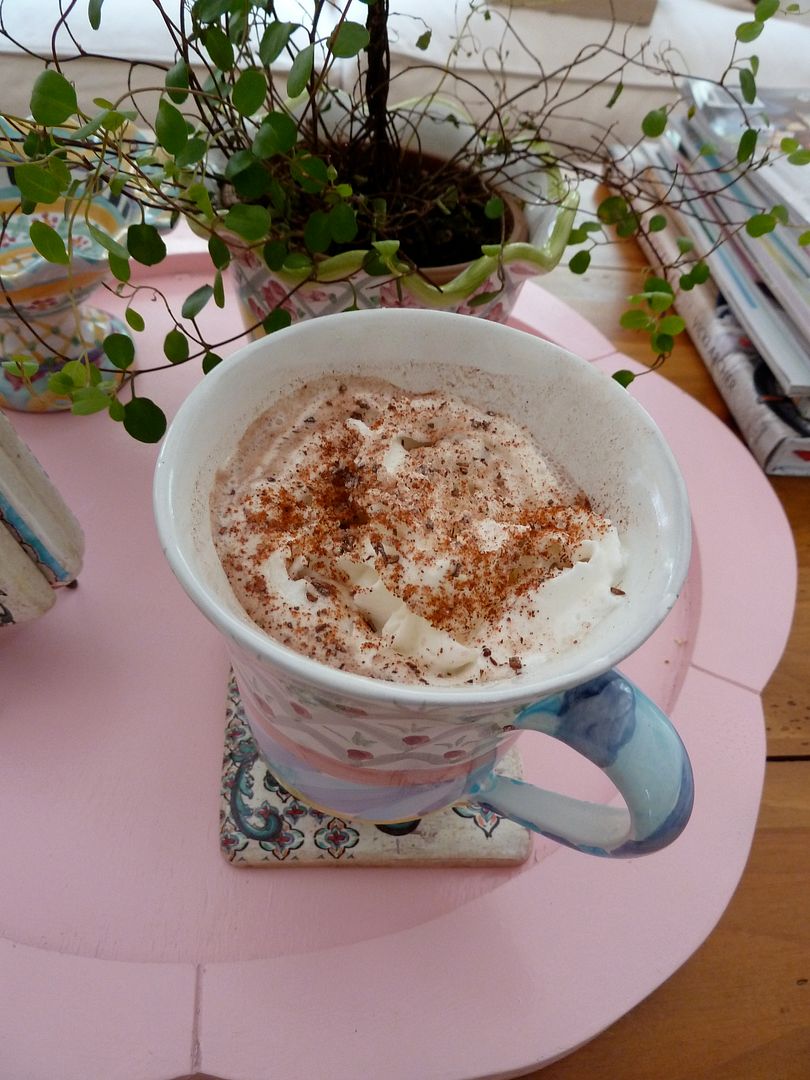
Guest Post! Mexican Spiced Hot Chocolate by Ricki Jill from Art @ Home

Hello, y'all!  My name is Ricki Jill, and my blog is called Art @ Home.  I am so excited to write a guest post for Rissa because she was one of my very first "bloggy friends."  I have always wanted to visit Australia, and in honor of Rissa, I thought I would share my fantastic Mexican Spiced Hot Chocolate recipe since it is the beginning of winter Down Under.

Photobucket

  Mexican Spiced Hot Chocolate 
 2 oz. (2 squares) unsweetened chocolate 
1/3 cup sugar
4 cups milk 
pinch salt 
1/2 teaspoon vanilla 

Garnish: 
1 teaspoon chipotle chili pepper 
1 teaspoon ground cinnamon 
whipped cream 

 Mix chocolate, sugar, milk, and salt in a two quart sauce pan over medium low heat until the chocolate is melted and the ingredients are well blended.  Add vanilla.  Pour hot chocolate into mugs. 

 Garnish each with two or three tablespoons whipped cream, and two pinches each of chipotle chili pepper and ground cinnamon. 

 Recipe serves four.

Photobucket

  Enjoy! 

 Blessings! 
Ricki Jill

Yum!! That sounds amazing Ricki Jill! I'm so happy to have you posting here today! 
Art @ Home is another of my favourite blogs, Ricki Jill's Happy Lists always brighten my day! Art and book lovers especially should pop over for a visit! <3


Sunday, June 12, 2011

Guest Post! Bureau Runner by K from The Littlest Crafter

I'm very excited to be over here guest blogging for Rissa while she's AWOL. I love Hazel and Honeysuckle and all the great projects and tutorials...but I don't need to tell all of you that! I'm K, from over at The Littlest Crafter. Here's a little bit about me. I've been blogging since the beginning of this year (with lots of help from our friend Rissa!). My hubby gave me my very first sewing machine just last year, and my blog was a way to show my friends and family what I had been up to. Surprisingly it has turned into so much more, as I'm sure other bloggers out there can attest to. I have two lovely children (a girl, Little K, and a boy, Little Mister C) and a to-do list about a mile long. 

Today I want to share a little project that I made for our Master Bedroom. We have a nice long bureau in our room and I like to keep it somewhat covered so that it doesn't get scratched up or stained. For the past 7 years, I have had the same two place mats that I purchased at the dollar store on there. I think I was long over due for a change....you know, something like this?


My older sister had given me some sample fabrics and I dug through the pile and found two that I really liked.  Because they are samples, there was not one that was long enough by itself so I decided to make kind of a patchwork. But, it had to be an easy patchwork.


My bureau was about 55 inches long and my fabric length was around 50 inches. I didn't mind that it didn't cover the entire length of the bureau. The first thing I did was take the longer piece and cut it in half. The plan was to simply add the smaller decorative piece in the middle. I lined up my shorter fancy fabric, put the right sides together and sewed a simple straight stitch.


This is what it looked liked with one side attached.


I did the same thing with the other half and this was my final product.
You'll want to iron your seams down as well.


Originally I had planned on doing another patchwork on the other side with brighter colored fabrics. This way it would be reversible, and I could change it depending on my mood. However, after two attempts, over 2 days, of putting the two patchworks together, I gave up. It was just not meant to be.


On a side note, don't use a stitch ripper when you are angry, not only does your fabric suffer, but you're likely to suffer yourself, like when you stab yourself in the thumb... like I did. So what I decided to do instead was to fold over the edges of my runner, and sew a simple straight stitch all the way around. I started with the shorter ends first.


Then I pinned down the longer sides and sewed them up.


And voila, you're done! A lovely new table runner, or in my case, Bureau Runner.


What do you think?


Big thanks to my lovely hostess Rissa, and of course to all of you for reading! Thanks for having me! Hope you have a wonderful day and an awesome weekend. 

K. 
The Littlest Crafter

Thanks so much for guest posting today K, it was an absolute pleasure having you here! 
I love K's blog The Littlest Crafter! I highly recommend a visit - and say hi from me when you do!


Scrap Box Sunday: Link Party #12 continued...

The link party is still going! Join in the fun!

I'm officially "not here" right now but the link party from last week is still open! Link up anything that you've made with scraps lying around your craft room! It doesn't have to be fabric scraps, it could be paper, ribbon, food, beads anything! You've got until Thursday! 

Just display H&H's button somewhere on the post or in your sidebar, and link up! Link as many projects as you want, as long as you haven't linked them up here before.


Wednesday, June 8, 2011

Whip It Up Wednesday: Adventures in Skirt Making

Today is more "sharing time" than "tutorial time" - I'm really not advocating my method of skirt making!! 

But this is the first time I got to use my new baby! Well, new to me ^_^


Isn't she preeeetty? A lovely oldish Elna overlocker.

OK, so here's how I made my double layered skirt!

I used two layers of fabric, one see through and one opaque, and pretty ruffle edged wide elastic for the waist band.

I took my sheer fabric (I have a confession to make - I don't know fabric types! I need to learn!) and folded it over a few times to a manageable width. It's about two metres wide. Then I measured myself from waist to under my knee, measured the fabric and CHOPPED IT OFF at that line. I didn't mark it or anything.


I like to wing it. That's not so terrible is it? 

OK, next I used my overlocker to do a rolled hem at the top and bottom of my sheer fabric strip.


Then I folded it in half, right sides facing in, and did a rolled hem up the open edge as well.


To make the opaque layer, I took my fabric, folded it in half and half again, and then laid one of my existing (and favourite!) skirts over the top. I traced the outside and cut it out.


This gave me two opaque panels, a front and a back, to go with my sheer layer.


Unfortunately I forgot to take into account the fact that my favourite skirt is zip up, and the one I'm making has an elastic waist and needs more fabric around the waist area so it can be stretched! To combat this, I ended up cutting the top third off the opaque panels so the waist area is wider.

Next I overlocked the top and bottom of each opaque panel. I then pinned the two pieces together, right sides facing, and sewed them together up the sides.


I measured my waist and then decided I wanted to wear the skirt on my hips, so I measured there instead. I cut out a piece of elastic that was a bit smaller than the measured distance, and then folded it in half and sewed up the edge.

Now there are three pieces ready to be sewn together, an under-skirt, over-skirt and waist band.


First, I pinned my sheer top layer to the inside of my elastic, pinning the pleats into place.


Next I pinned the under-skirt on top of that, moving the pins from the sheer layer to include both layers. 


Finally, I used my trusty sewing machine. Alas, the overlocker couldn't be used for this step ;) I set my sewing machine to a wide zig zag stitch and sewed all around the waist band using matching cotton thread. Make sure you pull the elastic taut while you do this.


I tried it on, and realised my waist band was too wide - whoops!! So I folded an edge in and sewed it up. It now looks like this:


Aaaand we're done. I'll probably make some kind of flower pin to attach to my weird folded up elastic patch.


Not too shabby for a first (and patternless!) attempt at skirt making, right?


Related Posts Plugin for WordPress, Blogger...